Self Hosted Azure Test Runners
Per Test: Setup Your Account as a Test Runner Source
Test Runner instances generate load for your test. These instances can self-hosted within your Azure account. Testable will create the VM scale set for your test within your Azure account as part of running your test and terminate it upon test completion.
In order to make this work you need to grant Testable access to your Azure account. The steps to do that are detailed in this guide.
Step 1: Create an Azure account
If you do not already have an Azure account, go to azure.microsoft.com to create a free one.
Step 2: Install the Azure CLI
The Azure CLI is the command line tool for managing Azure resources. Follow the install guide for more details.
Step 3: Get your Subscription ID
Either via the Azure portal (under Cost Management + Billing => My Subscriptions) or via the CLI (after performing az login) with the following command:
az account list --output json
The id field in the output is the subscription ID.
[
  {
    "cloudName": "AzureCloud",
    "id": "xxx",
    "isDefault": true,
    "name": "Free Trial",
    "state": "Enabled",
    "tenantId": "yyy",
    "user": {
      "name": "foo@bar.com",
      "type": "user"
    }
  }
]
Step 4: Create a service principal
Create a service principal with “Owner” access to the subscription in which Testable will create resources. You can do this using the Azure CLI as follows (use the subscription ID from step 3):
az ad sp create-for-rbac -n "Testable" --role owner --scopes /subscriptions/xxx
The output will look as follows:
{
  "appId": "aaa",
  "displayName": "Testable",
  "name": "http://Testable",
  "password": "bbb",
  "tenant": "ccc"
}
The appId (client ID), password (client secret), and tenant (tenant ID) are all required for setting up your Azure account as a source.
Step 5: Create a Test Runner Source
Login to your Testable account and go to Org Management => Test Runner Sources and select tab Azure and click on the Register Azure Account as Source tile.
Use the subscription ID from step 3 and the other details from step 4 to setup the test runner.
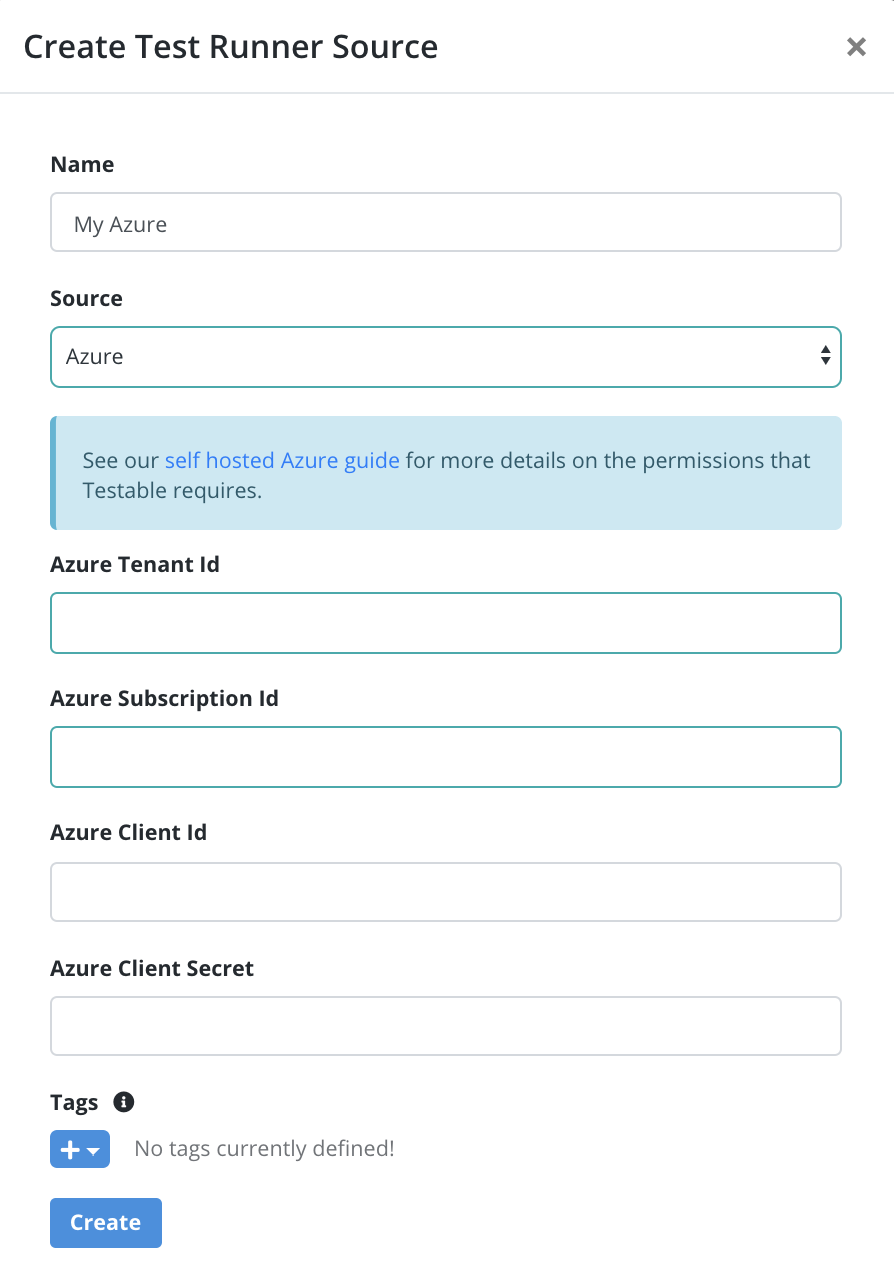
And that’s it! You will now see this test runner in the list when you create a new test configuration.

Long Running Azure Test Runners
Test Runner instances generate load for your test. For various reasons it often makes sense to manage your test runners independent of your test runs.
Starting Long Running Test Runner VMs
See our test runners guide for more details on how to launch VMs and associate them to self-hosted regions on Testable to which you can assign tests.
Creating an Auto-Scaling VM Scale Set
Step 1: Create a VM Scale Set
In your account you’ll need to create a VM scale set that uses the Testable image in the Azure Marketplace as the VM image.
Make sure to note the resource group and VMSS name for the next couple steps.
Important Notes:
- Make sure you use custom data to automatically register the VMs as test runners in one of your self-hosted regions. See our test runners guide for more details on how to do that.
- [Windows Only] Make sure you use
testableas the adminstrator account so that auto-logon is enabled.
Step 2: Report Runner Metrics to your Scale Set
The idea here is to regularly report the number of free test runners in the chosen region. Any test runner which is currently running a test is not considered free.
See report-metrics.sh for an example of how to report that metric which comes from the GET /orgs/:id/regions/:regionName API endpoint (freeAgentCount property).
The report-metrics.sh script queries this information as well as the # of VMs that currently exist in the scale set and report a few custom metrics to your VM scale set in the Testable namespace:
Free-Runners: # of test runners not currently executing any tests. A useful metric to scale out/in based on. For example scale out if Free-Runners < 1 or scale in if Free-Runners > 3.Active-Runners: # of active test runners in the specified region.Pending-Runners: # of VMs that have been added/removed that is not yet reflected in the Active-Runners count. This is because it takes some time for the runner to initialize and/or fully unregister.
You can register this script to run regularly via crontab or another scheduling or CI system.
Step 3: Setup Autoscaling Using Runner Metrics
See setup-autoscaling.sh for an example of how to set up scale out/in rules that leverage the metrics from step 2.
This can also be done from the Azure portal.
And that’s it. Run tests assigned to the VMSS assigned Testable region and watch it scale out/in based on the number of active tests.