Getting Started - Playwright Test Framework
Introduction
You can use the Testable platform as a remote Playwright grid. Each Playwright session will run on a Testable test runner according to the options you provide in the URL. This includes support for all Cloud providers, in your account or ours, as well as self-hosted test runners. Each session will produce a test report that includes all assertions, commands, screenshots, video, browser performance metrics, and network metrics. The test reports can be shared and customized to your requirements.
There are 3 ways to run your Playwright tests pointed at Testable:
- Playwright Library: Playwright Library provides a set of APIs for launching and interacting with browsers.
- Playwright Test + Testable Fixture [THIS GUIDE]: Playwright Test framework is a framework for end-to-end testing. Use the testable-playwright-test fixture to point your test at Testable Cloud. Each browser session will launch on a Testable test runner and a tunnel will be setup from your Playwright test session to the test runner.
- PLaywright Test + Remote Selenium Grid: Point your Playwright Test run at Testable as a remote Selenium grid.
Your Test Setup
Here is an example playwright.config.ts and example.spec.ts that will launch all browser sessions required by your test on Testable test runners:
playwright.config.ts
import { devices } from '@playwright/test';
import { defineConfig } from 'testable-playwright-test';

export default defineConfig({
  testDir: './tests',
  // with Playwright Test you specify the choice of browser, device here instead of in the Testable options,
  metadata: {
    // this tag will be applied to all test reports related to this test session
    tags: process.env.TAG || 'tag-123'
  },
  projects: [
    {
      name: 'chromium',
      use: { ...devices['Desktop Chrome'] },
    },
    // ...
  ],
}, {
  // API key (Org Management => API Keys)
  key: 'xxxxxxxxx',
  // Gets logged with the test indicating which user ran this test, defaults to 'remote'
  user: 'demo',
  // The region in which to run your test
  region: 'aws-us-east-1',
  // Whether to capture an automatic screenshot after each test step (afterEvery) or after failed test steps (afterFailed)
  screenshot: 'afterFailed',
});
tests/example.spec.ts
// no changes necessary to work with Testable Cloud
import { expect, test } from '@playwright/test';

test('has title', async ({ page }) => {
  await page.goto('https://google.com/');
  await page.waitForTimeout(1000);
  await page.screenshot({ path: 'test.png' });
  await expect(page).toHaveTitle(/Google/);
});
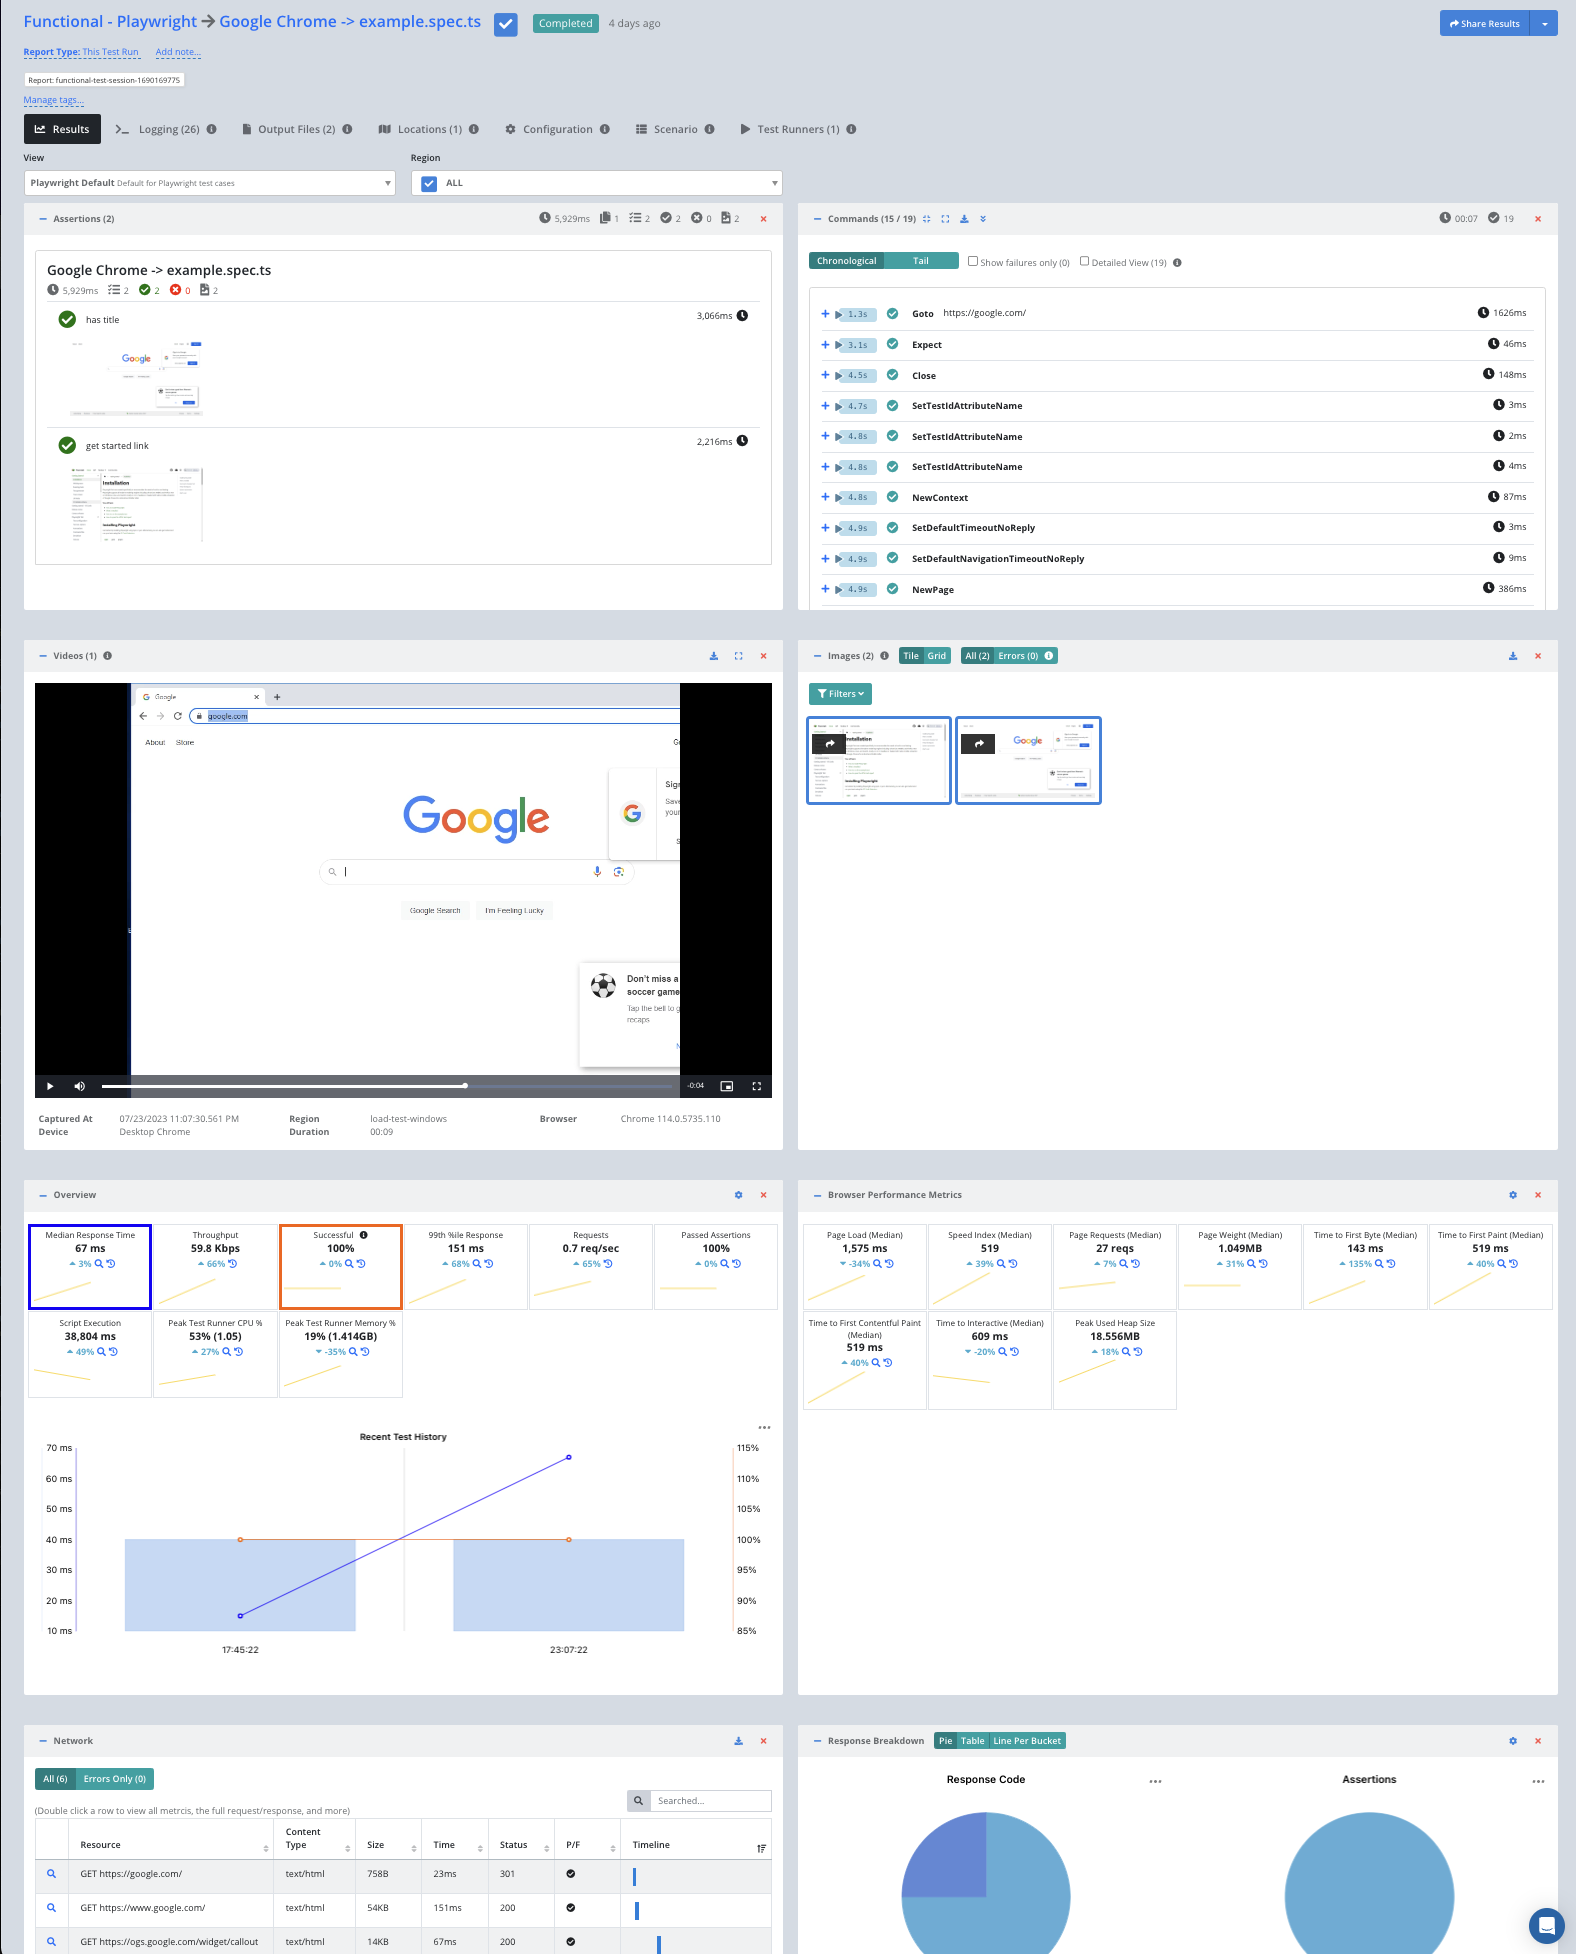
This test spec simply loads https://google.com, waits 1 second, takes a screenshot, and then checks that the title contains “Google”.
It does this in a desktop Chromium browser. You can configure additional browsers/devices in your playwright.config.ts file.
Test Reports
During and after your test run you should also be able to login to Testable and see your test sessions under Recent Test Runs.
There will typically be one session per browser/device/test combination.
All the test reports will contain the tag you specified in your playwright.config.ts. If you click on the tag name you can see a report of all the sessions related to your test run.
TODO screenshot of all playwright tests with same tag; one screenshot of a single report
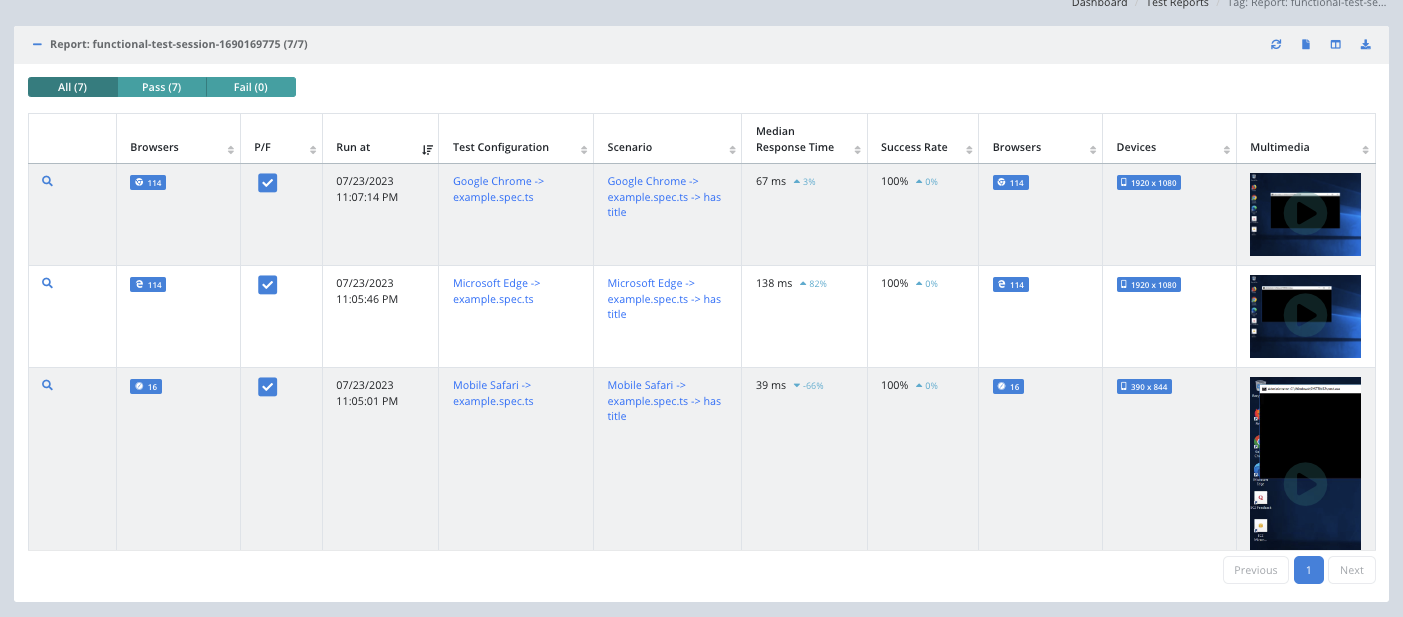
Click the magnifying glass to view the full test report including a video recording, metrics, Playwright logs, etc.
See the options type definition in testable-playwright-test. Alternatively use the remote configurator on the Testable website to discover the full set of options and their possible values. After logging in, use the Create Test action menu and choose Remote Test.
That’s it! Go ahead and try these same steps with your own scripts and feel free to contact us with any questions.