Locust Overview
- Introduction
- Supported Versions
- Create a Scenario
- Languages
- Source
- Locust Arguments
- Files
- Declared Params
- Runtime Environment
- Locust4j
Introduction
Testable has support for executing Locust tests in a globally distributed fashion. We also support Locust4j for those that want to write their Locust tests in Java.
Check out the Getting Started with Locust guide for a quick introduction on how to run your tests.
This section of the documentation goes into further detail on the various options, environment variables, etc that we support when running a Locust test.
Supported Versions
Testable currently supports the following Locust and Python versions:
- Locust: 0.14.5, 1.5.2, 2.14.2
- Python: 2.7.6, 3.6.6, 3.7.7, 3.10
- Locust4j: 1.0.9 1.0.14 2.2.0
The chosen versions are combined into a virtualenv on each Testable test runner when you execute your test.
Creating a Locust Scenario
There are two ways to create a Locust scenario:
- Create a new Test Case (Create Test button on the dashboard or Test Cases -> New… on the left nav), select Locust file during step 2.
- Go to an existing test case and click on the Scenario tab. Click the New Scenario button and select Locust file as the scenario type.
Languages
Locust is a Python tool but also has support for several other languages. Testable supports the following:
- Python (default). Write a python script that is executed by Locust.
- Java (Locust4j). Write your tests in Java with locust4j. Testable will automatically spin up a master and slave for each Locust instance. Results across Locust instances are then aggregated by Testable. See below for more details.
Source
There are two ways to load your Locust code onto Testable.
- Upload: Upload all files/folders required to run your Locust test including scripts, csvs, etc.
- Version Control: Project is cloned from version control onto the test runner. The project folder becomes the working directory on the test runner when your test runs.
Locust Arguments
The scenario allows you to define all the arguments that are passed to the Locust process via command line arguments when it is run on the test runner.
This includes the locust file, host, concurrent clients, hatch rate, # of requests, locust classes, log level, step load, step users and step time.
Files
Upload all files required to run your Locust test including the .py files, CSVs, data files, etc. If you upload a zip file it will be unzipped automatically at runtime on the test runner.
Check the “split CSVs across test runners” to have any uploaded CSV split up across test runners when running your test.
Declared Params
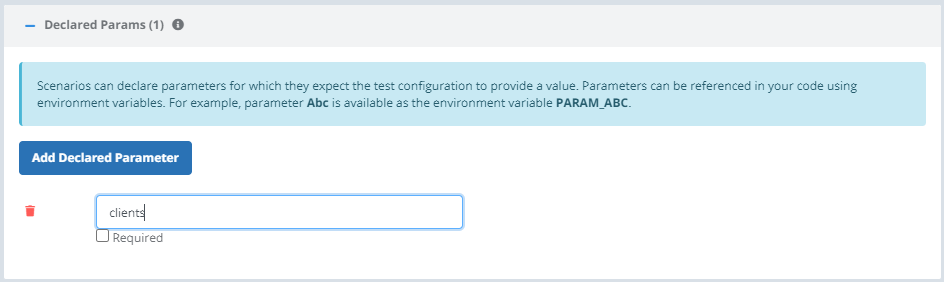
Parameterizing your scenario allows you to set a value in your Test Configuration or via API and access the value within your scenario.
Parameter values can be accessed in your Python code as environment variables (e.g. parameter Abc can be accessed with environment variable ABC).
Parameter values can also be accessed in other scenario settings (e.g. clients, hatch rate, run time, etc). For example let’s say we want to change the number of concurrent clients per Locust instance when defining our Test Configuration.
- Add a clients parameter in the Params section.
- Use this value within a property using the
${clients}syntax. - When you create your Test Configuration it will ask you to specify a value for clients. This value will then be passed down into your test plan as defined above.
Read more about scenario parameters here.
Runtime Environment
See our Locust runtime environment page for a listing of all environment variables that are passed to the Locust process at test runtime.
Locust4j
Utilize locust4j and write your Locust tests in Java.
Your Java code will be run as a Locust slave process with each Locust4j process having a separate master local to the test runner. Results across test runners are aggregated on Testable’s reporting infrastructure.
Your code will receive the Locust master host/port via system properties LOCUST_MASTER_HOST and LOCUST_MASTER_PORT:
Locust locust = Locust.getInstance();
locust.setMasterHost(System.getProperty("LOCUST_MASTER_HOST", "127.0.0.1"));\n' +
locust.setMasterPort(Integer.getInteger("LOCUST_MASTER_PORT", 5557));
Once you have written your code use these steps to setup a Locust4j scenario:
- Create a Locust scenario (see above for details).
- Select Language = Java
- Select the Source. There are various options including to create/edit your Java file directly on Testable. The options are explained in detail on the scenario page.
- Smoke test or create a test configuration to run your Locust4j tasks. It should work seamlessly.