Recordings
- Introduction
- Create a recording
- Recording steps
- Creating a test configuration
- Converting to a Node.js script
- FAQ
Introduction
Record-and-replay can be a nice quick way to setup a load test. Use Testable’s proxies to record all traffic while performing a set of actions in a browser, API, or mobile application. Each recording can capture steps using either a man-in-the-middle (MITM) HTTP proxy (so HTTPS and secure websocket traffic can be recorded) or a reverse proxy. In both cases HTTP, HTTPS, and websocket traffic can all be recorded and replayed seemlessly. Using each type of proxy is explained in detail below.
Create a recording
To create a new recording, login to Testable, and then either:
Option 1: Create a Test Case. During the Scenario step select Create Recording.
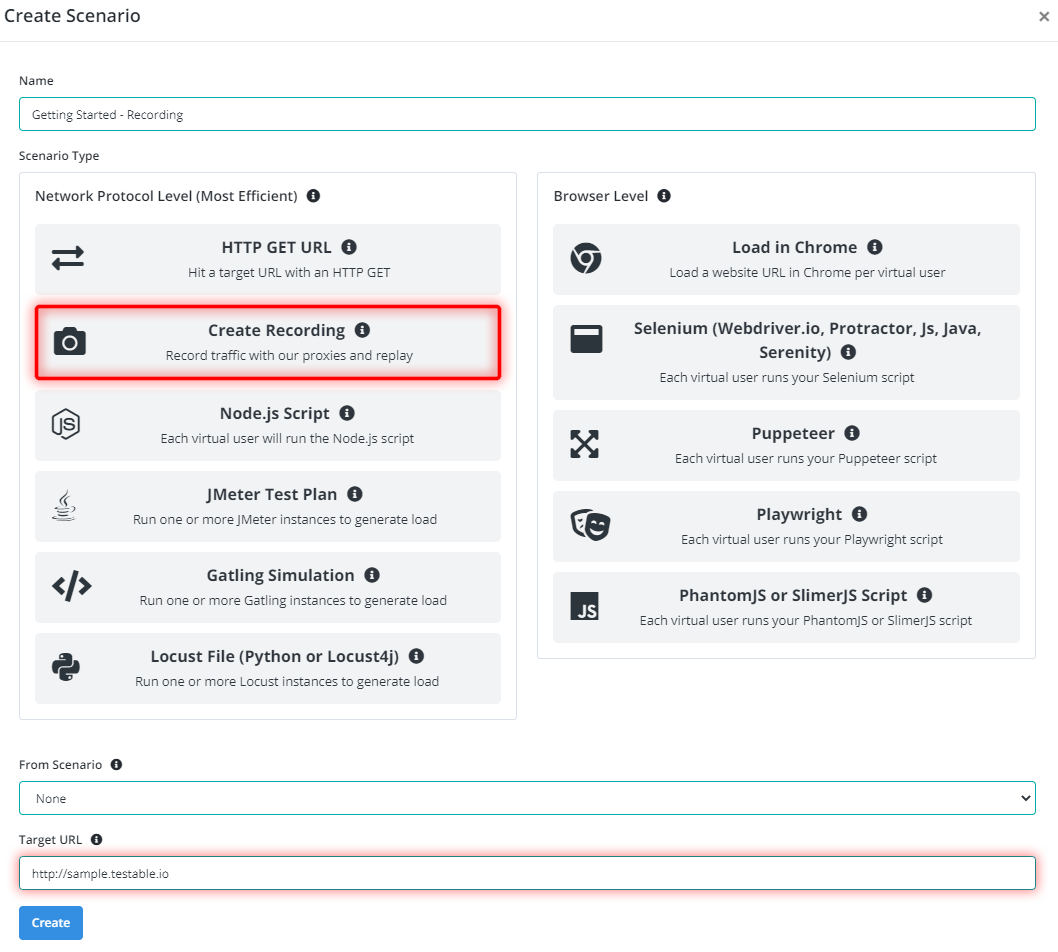
Option 2: Click on a test case name on the dashboard or select one from top nav. Then press the New Scenario button. Select Scenario Type = Recording. The “target URL” is used for setting up the reverse proxy.

At this point you will be taken to the recording page where you can see any recorded steps appear in realtime.

Recording steps
Each recording can capture steps using either a man-in-the-middle (MITM) HTTP proxy (so HTTPS and secure websocket traffic can be recorded) or a reverse proxy.
Via HTTP proxy
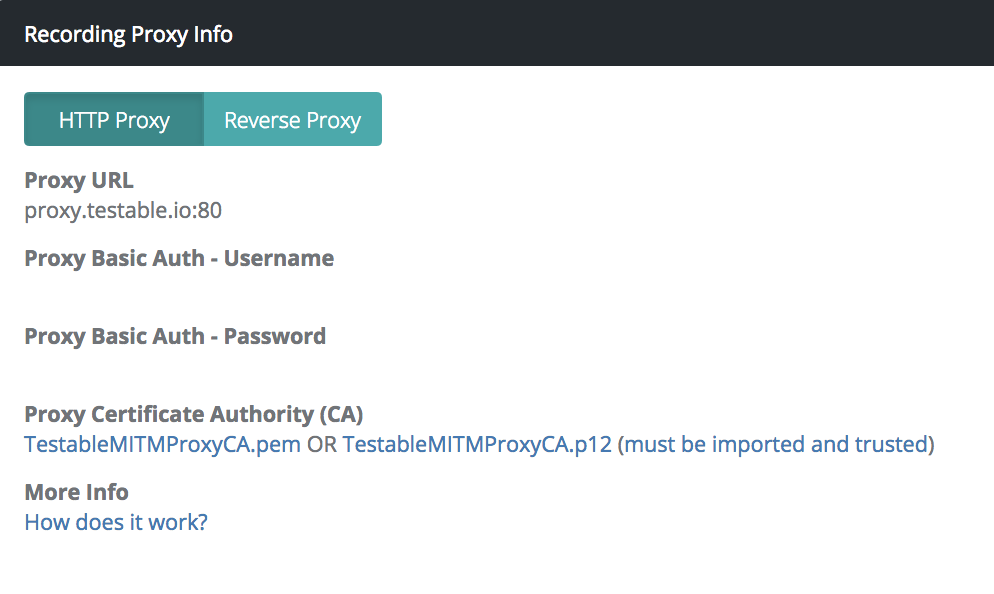
On the recording page you can find details on the URL, username, password, and certificate authority for the proxy. Depending on the device, OS, and browser there are different ways to setup the proxy details.
If you are using Chrome we recommend the SwitchyOmega extension to easily configure and switch between multiple proxies.
Before using the proxy you will need to setup Testable MITM Proxy Certificate Authority (TestableMITMProxyCA.pem OR TestableMITMProxyCA.p12) as trusted on your system. Check out mitmproxy’s guide on this subject for guidance but make sure you trust the Testable CA and not mitmproxy.
Via reverse proxy
The reverse proxy URL can simply be used in place of the target URL and all interactions will be recorded as steps. For example, paste it in a browser and it can be used like the target website. Or change your app settings to point at the reverse proxy URL.
There is no need to import any untrusted certificates in this case because the MITM (i.e. the reverse proxy) is explicit unlike with a traditional HTTP proxy.
This can be useful for recording some steps quickly without having to alter any proxy settings.
Creating a test configuration
Once you are finished recording the steps simple choose Stop Recording in the upper right action menu. After that you can choose the New Configuration option to configure a new test configuration that will replay the recorded steps as many virtual users around the globe.
Converting to a Node.js script
If you need to alter the recorded steps you can convert it to a Node.js script using the Convert to Script action in the upper right. This can be useful if you want to change auth related headers, the delay between steps, etc.
FAQ
How Do I Stop a Recording?
Before you can use the recording to run a test you must stop the recording by clicking the Stop action in the upper right dropdown menu.
What Does the Limit Breached Status Mean?
Your account has limits on number of steps and size of the recording. If these are exceeded your recording will be automatically stopped and the status will be Limit Breached.
To see your current limits, go to Settings -> Limits.