Getting Started - PhantomJS or SlimerJS
Follow this guide for a basic example of running a PhantomJS or SlimerJS script. For our example we will use a simple script that opens https://www.google.com.
Start by signing up and creating a new test case using the Create Test button on the dashboard.
Enter the test case name (e.g. PhantomJS Demo) and press Next.
Scenario
Select PhantomJS Script as the Scenario type.
For the Script Type select PhantomJS script and for Version select Phantomjs-2.1.1. Testable gives you 3 options on how to define your PhantomJS scenario:
- Open URL: Simply specify a URL to open and Testable will generate the required PhantomJS script.
- PhantomJS script: Provide the PhantomJS script to execute.
- Code to execute in browser: Instead of writing a PhantomJS script, simply provide the webpage code (HTML/Javascript/CSS) to open in the headless browser. Testable will generate the required PhantomJS script.
Note that any files you upload to your scenario are accessible from the same directory from which your test runs. So for example, if you upload index.html, you can put page.open(‘index.html’) in your PhantomJS script.
In our case we will use the handy templates to insert our required code quickly: Basic -> Open URL.
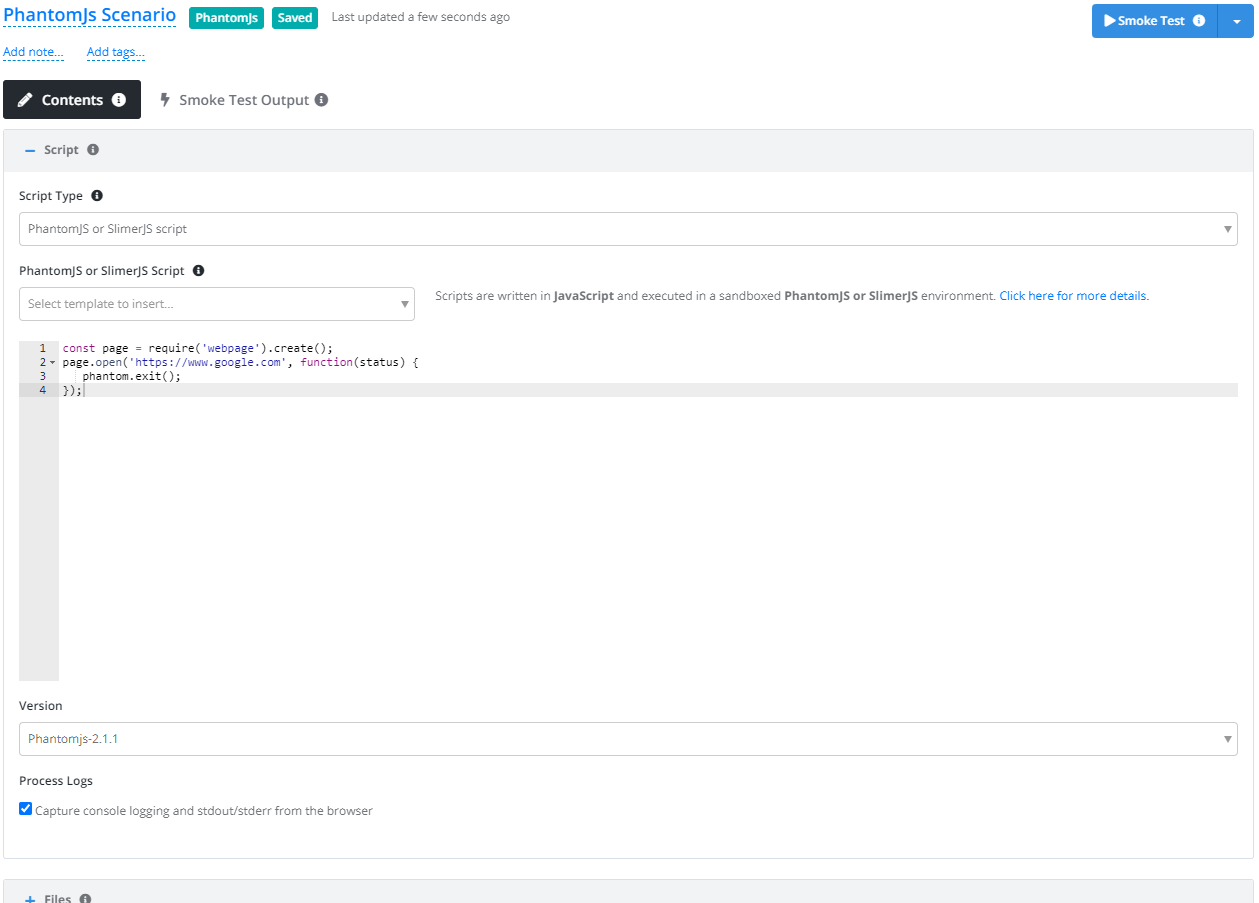
Click the Smoke Test button in the upper right to run your test plan with 1 thread and 1 iteration on a Testable test runner. The output of the run will show up in the Smoke Test Output once it finishes.
And that’s it, we’ve now defined our scenario! Click on the Configuration tab or press the Next button at the bottom to move to the next step.
Configuration
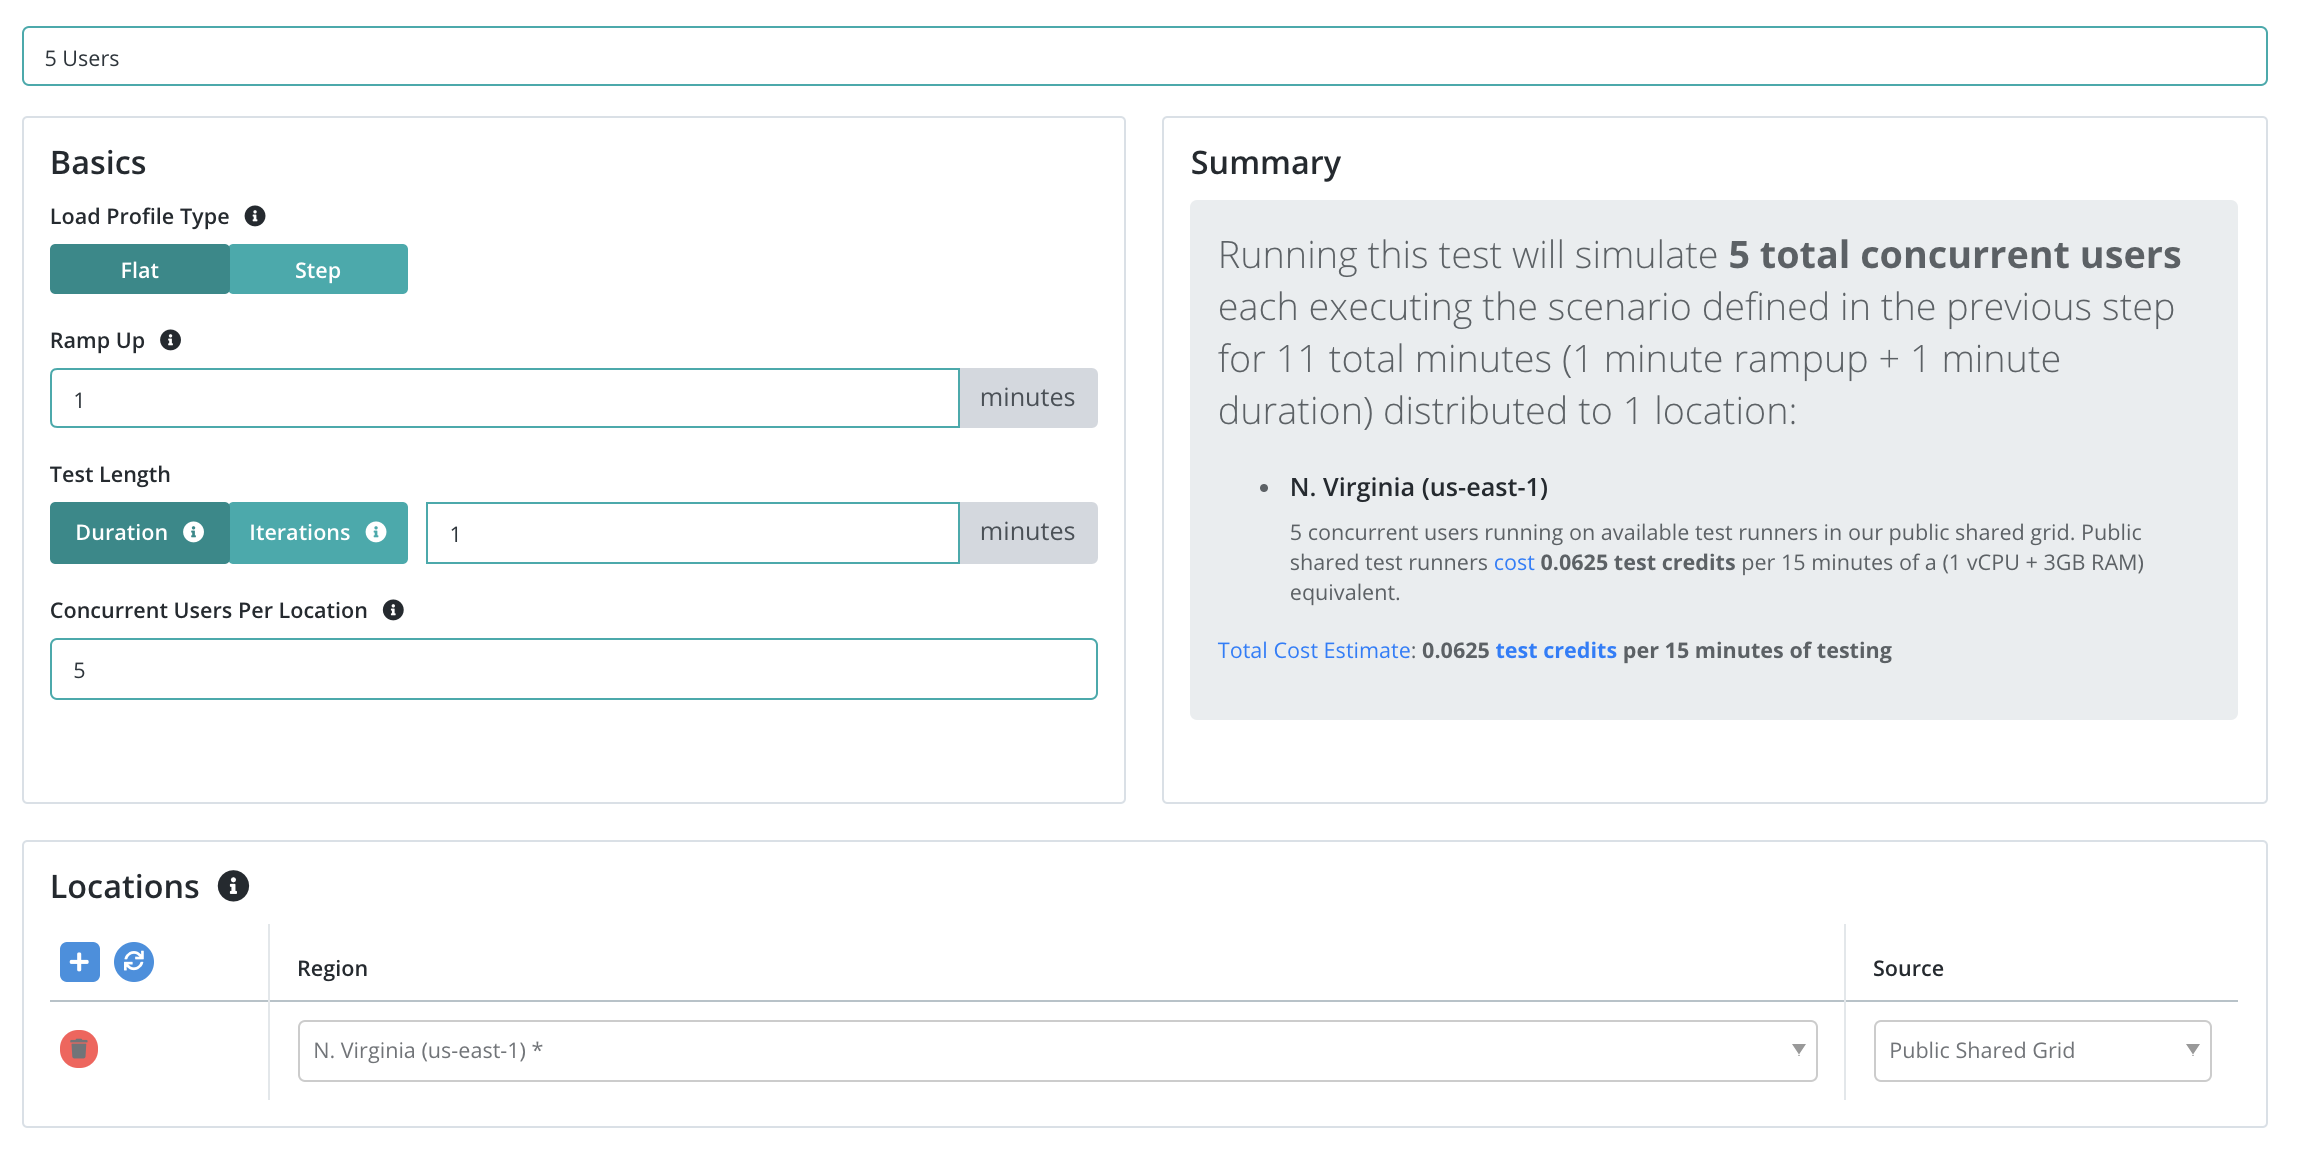
Now that we have the scenario for our test case we need to define a few parameters before we can execute our test:
- Total Virtual Users: Number of users that will execute in parallel. Each user will execute the PhantomJS script.
- Test Length: Select Iterations to have each client execute the scenario a set number of times regardless of how long it takes. Choose Duration if you want each client to continue executing the scenario for a set amount of time (in minutes).
- Location(s): Choose the location in which to run your test and the test runner source that indicates which test runners to use in that location to run the load test (e.g. on the public shared grid).
And that’s it! Press Start Test and watch the results start to flow in. See the new configuration guide for full details of all configuration options.
For the sake of this example, let’s use the following parameters:
View Results
Once the test starts executing, Testable will distribute the work out to the selected test runners (e.g. Public Shared Grid in AWS N. Virginia).
In each region, the Testable runners execute the PhantomJS script with 5 concurrent clients for 1 minute.
Below the resource result grid you can see various graphs. If you click on any resource in the grid, the charts below will update to be specific to that resource only.
Check out the PhantomJS guide for more details on running your PhantomJS or SlimerJS tests on the Testable platform.
We also offer integration (Org Management -> Integration) with third party tools like New Relic. If you enable integration you can do more in depth analytics on your results there as well.
That’s it! Go ahead and try these same steps with your favorite website or API and feel free to contact us with any questions.