Getting Started - OpenFin
Testable allows you to load test your OpenFin application by simulating virtual users launching and using your application.
Because the OpenFin runtime is Chromium, we can use Selenium to run our tests. This guide follows a basic example of running a sample OpenFin application with Webdriver.io on Testable. All source code can be found at openfin-wdio-testable-example.
Start by signing up and creating a new test case using the Create Test button on the dashboard.
Enter the test case name (e.g. OpenFin Demo) and press Next.
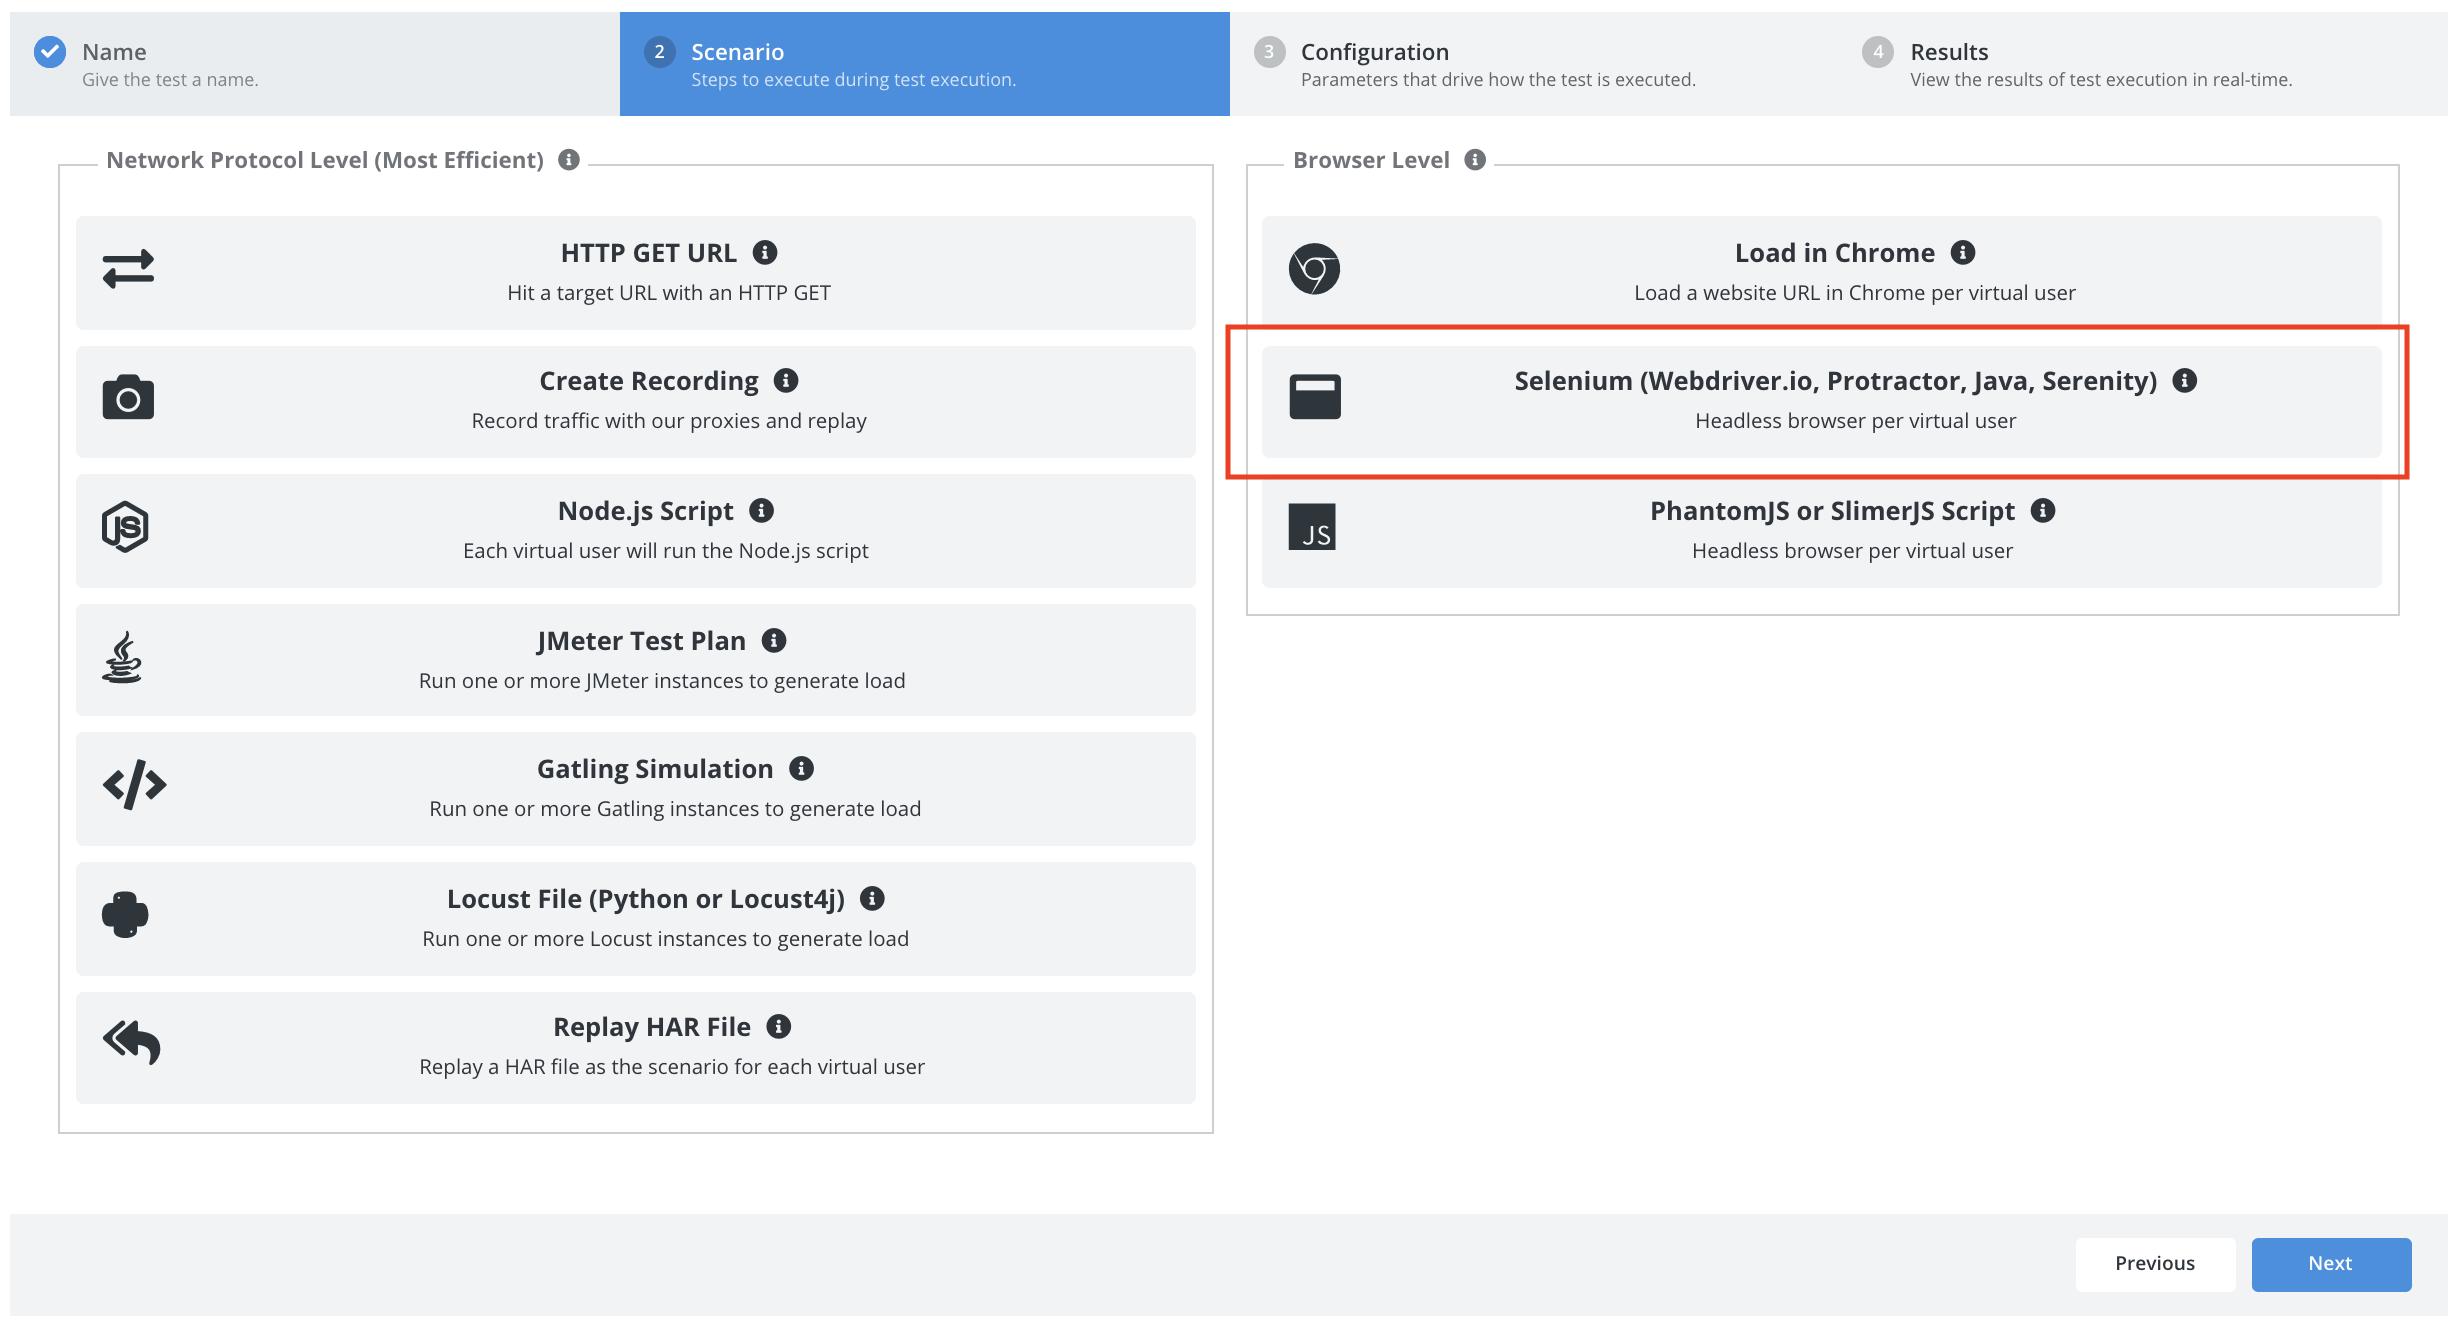
Scenario
Select Selenium as the scenario type.
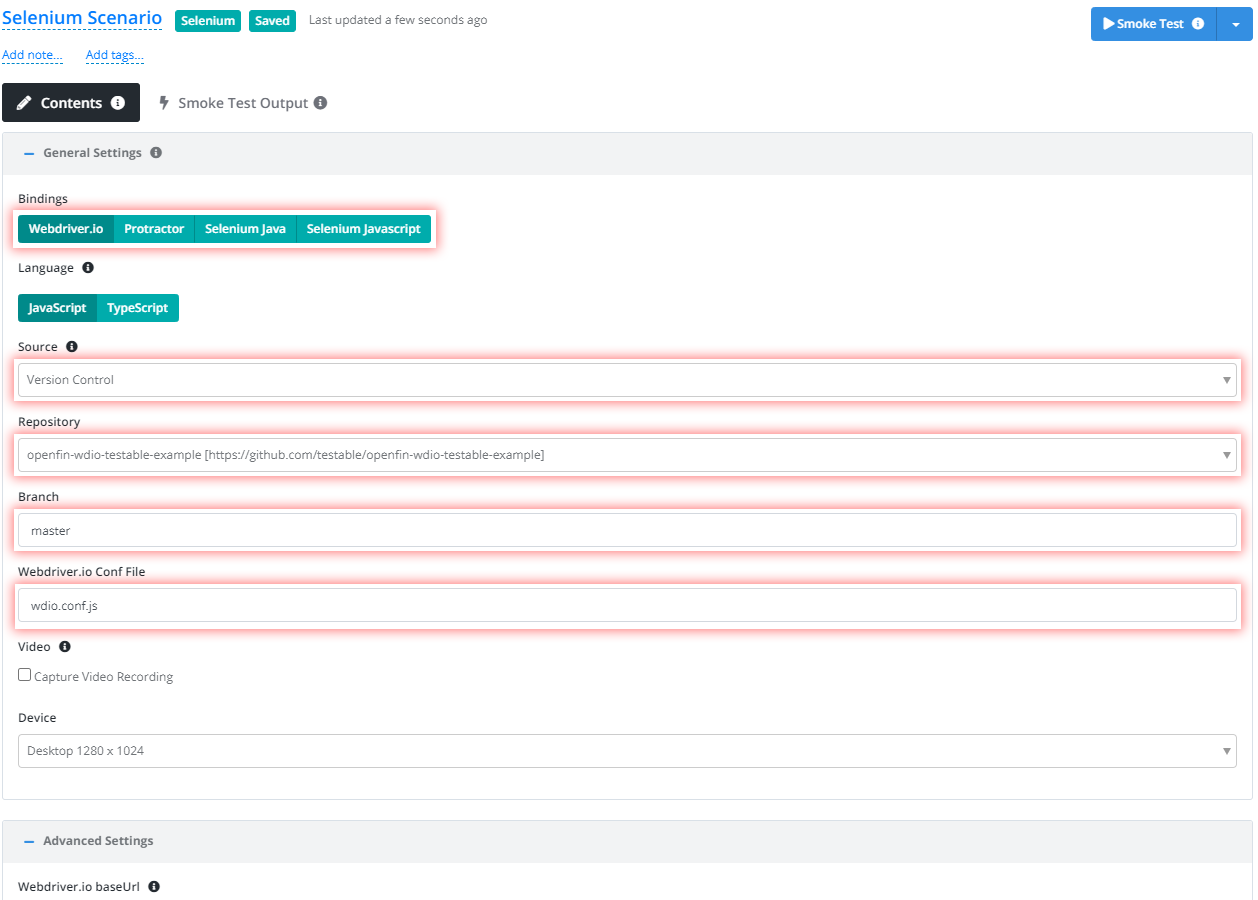
Let’s use the following settings:
- Bindings: Webdriver.io.
- Run Style: Conf File
- Source: Version Control.
- Language: Javascript
- Webdriver.io Conf File: wdio.conf.js
- Node Version: Latest
- Version Control Settings => Repository: Add New… use Url = https://github.com/testable/openfin-wdio-testable-example.git.
- Version Control Settings => Branch: master
Our example works both locally and on Testable.
Locally- Launches the OpenFin app at the start of the test and connects to itTestable- In your capabilities passtestable:optionswithopenfinConfigUrl: 'app_sample.json'.
For Testable the key snippet from the wdio.conf.js file:
capabilities: [
  {
    browserName: 'chrome',
    'testable:options': {
      openfinConfigUrl: 'app_sample.json' // a relative path within your repository or uploaded files OR an http(s) url
    }
  }
]
The sample test spec even captures a couple of screenshots which will be available as part of the test results.
Next, click on the Configuration tab or press the Next button at the bottom to move to the next step of configuring your test.
Configuration
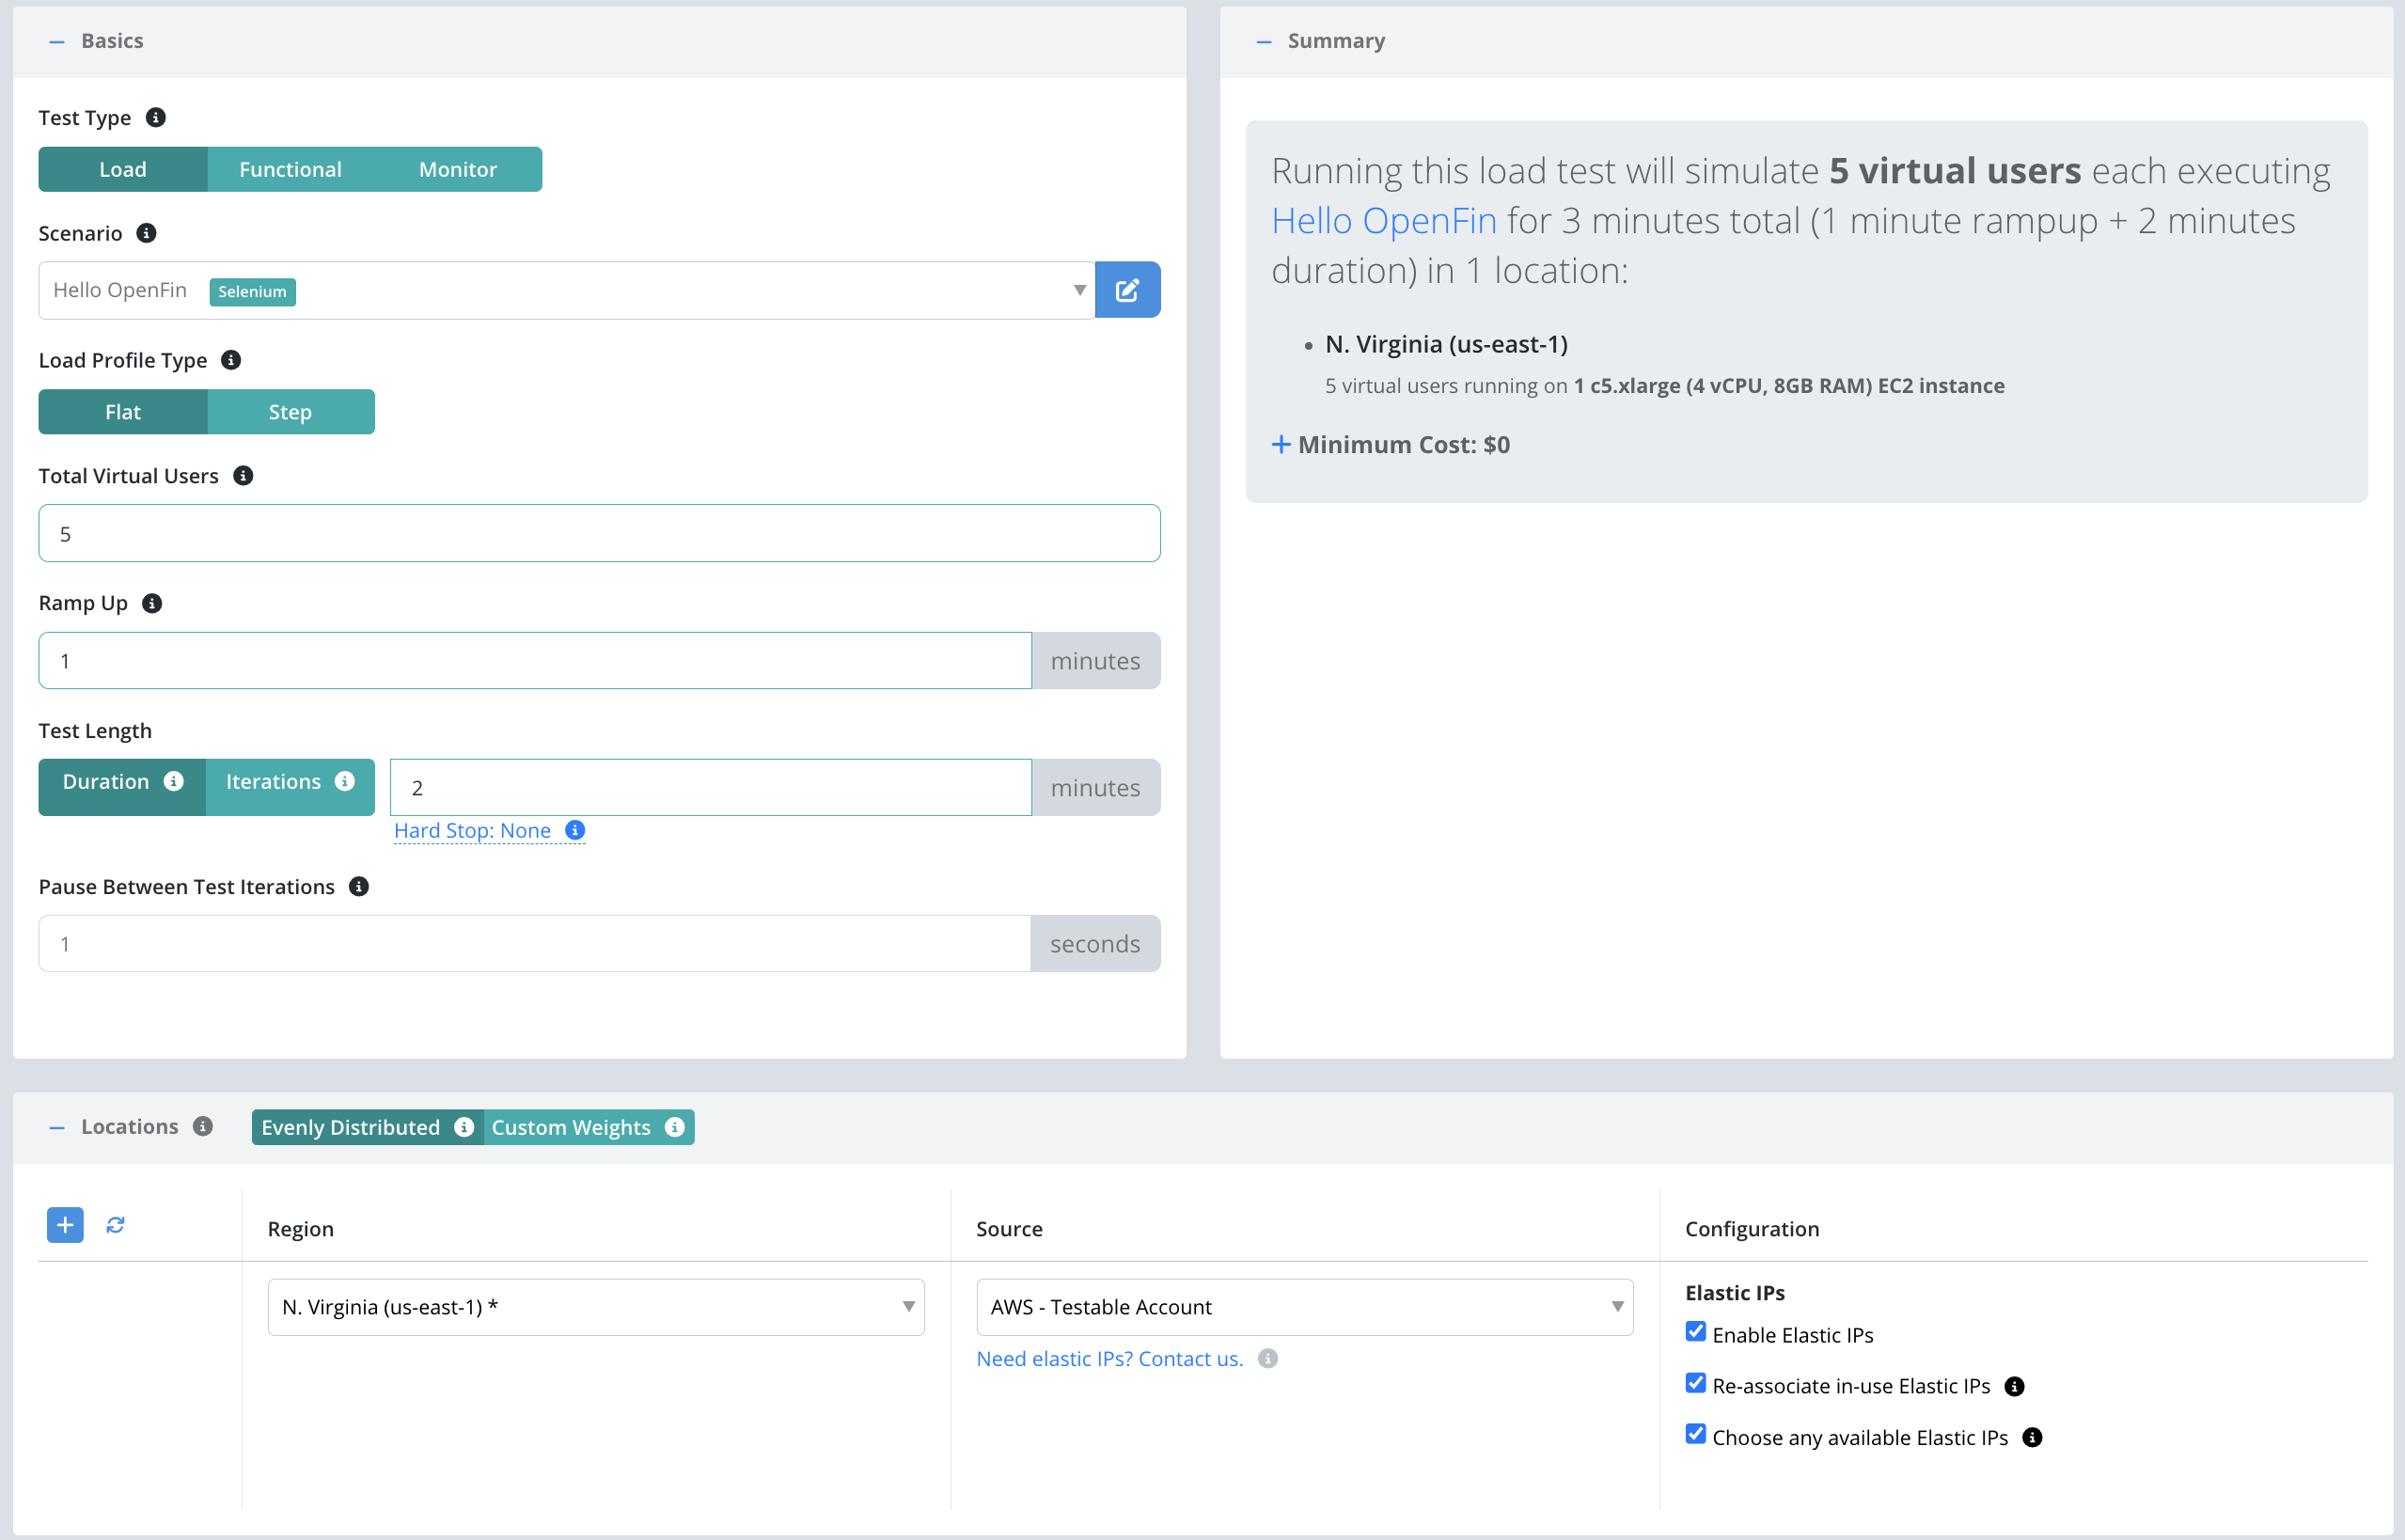
Now that we have the scenario for our test, we need to configure our load parameters including:
- Total Virtual Users: Number of users that will execute in parallel. Each user will execute the scenario (i.e. launch OpenFin and perform the test steps).
- Test Length: Select Iterations to have each client execute the scenario a set number of times regardless of how long it takes. Choose Duration if you want each client to continue executing the scenario for a set amount of time (in minutes).
- Location(s): Choose the location in which to run your test and the test runner source that indicates which test runners to use in that location to run the load test. For OpenFin tests, you will need to select either AWS On Demand - Testable Account or your own AWS account.
And that’s it! Press Start Test and watch the results start to flow in. See the new configuration guide for full details of all configuration options.
For the sake of this example, let’s use the following parameters:
View Results
Once the test starts executing, Testable will distribute the work out to the EC2 instances that Testable spins up.

In each region, the Testable runners runs the OpenFin test with 5 virtual users on 1 EC2 instance, each running the test for at least 2 minutes with a 1 second pause between test iterations.
The results will include screenshots, assertions, traces, performance metrics, logging, breakdown by URL, analysis, comparison against previous test runs, and more.
That’s it! Go ahead and try these same steps with your own scripts and feel free to contact us with any questions.