Single Sign On (SSO)
Table of Contents
SAML 2.0
By default, login to Testable is done using a password that is setup on the Testable platform. Testable also supports Single Sign On via full compatibility with the SAML 2.0 standard as a Service Provider (SP). Login can be initiated from Testable or from your Identity Provider (IDP) if they support that flow.
This allows for integration with any leading SSO vendor, Active Directory, Google, etc.
Setup - IDP Side
We include directions here for a few IDPs but any SAML 2.0 compatible IDP should work.
Settings
- Entity ID:
https://[subdomain].testable.io/api/login/ext/callback/saml - Assertion Consumer Service (ACS) URL:
https://[subdomain].testable.io/api/login/ext/callback/saml
Your [subdomain] is also configured on the Testable side and can be any 3+ characters that is not currently in use.
Attribute Mappings
Testable uses the nameID to get the email address. The following attributes are also used to set the user’s name:
fullName(no namespace). If set, we will use this value to set user’sNamein their profile.firstNameandlastName(no namespace). IffullNameis not set we will look for these two attributes and if available set the user’sNameto[firstName] [lastName].
Once you complete your setup, make sure to download the IDP Metadata XML and then continue onto the Testable side setup.
OneLogin
This section describes the steps on the OneLogin side to setup Testable.
- Login to your OneLogin account.
- Press the New App button in the upper right.
- Type “Testable” in the search box and select it.
- Press the Save button in the upper right
- Go to the Configuration tab and type in the same subdomain you setup within Testable. Press the Save button again.
- Click More Actions -> SAML Metadata to download the metadata. Open the file and paste the contents on the Testable side as part of the SAML setup.
Once you’ve done this and the SAML setup within Testable you are all set to login via https://[subdomain].testable.io.
Okta
Okta setup steps are documented on their site.
Azure AD
Steps on the Azure side to setup SSO.
- Login to the Azure portal and go to Enterprise Applications page
- Press
New Applicationand thenCreate your own application - Give it name
Testableand selectIntegrate any other application you don't find in the galleryand then press theCreatebutton - Go to your enterprise application and select
Single Sign Onin the left hand navigation. Then selectSAML. - Edit the
Basic SAML Configurationand set both the Identifier and Reply URL tohttps://[subdomain].testable.io/api/login/ext/callback/samlwhere[subdomain]is what you setup on the Testable side and pressSave. - Edit the
Attributes & Claimsand add the following 3 claims:firstName => user.givenname,lastName => user.surname,fullName => user.displayname. - Download the
SAML Certificates => Federated Metadata XMLand use that during the Testable side setup as theIDP Metadata.
Setup - Testable Side
-
Login to Testable using password authentication (or sign up for an account first).
-
Go to Org Management => Settings => Authentication and check the SAML 2.0 Authentication box.
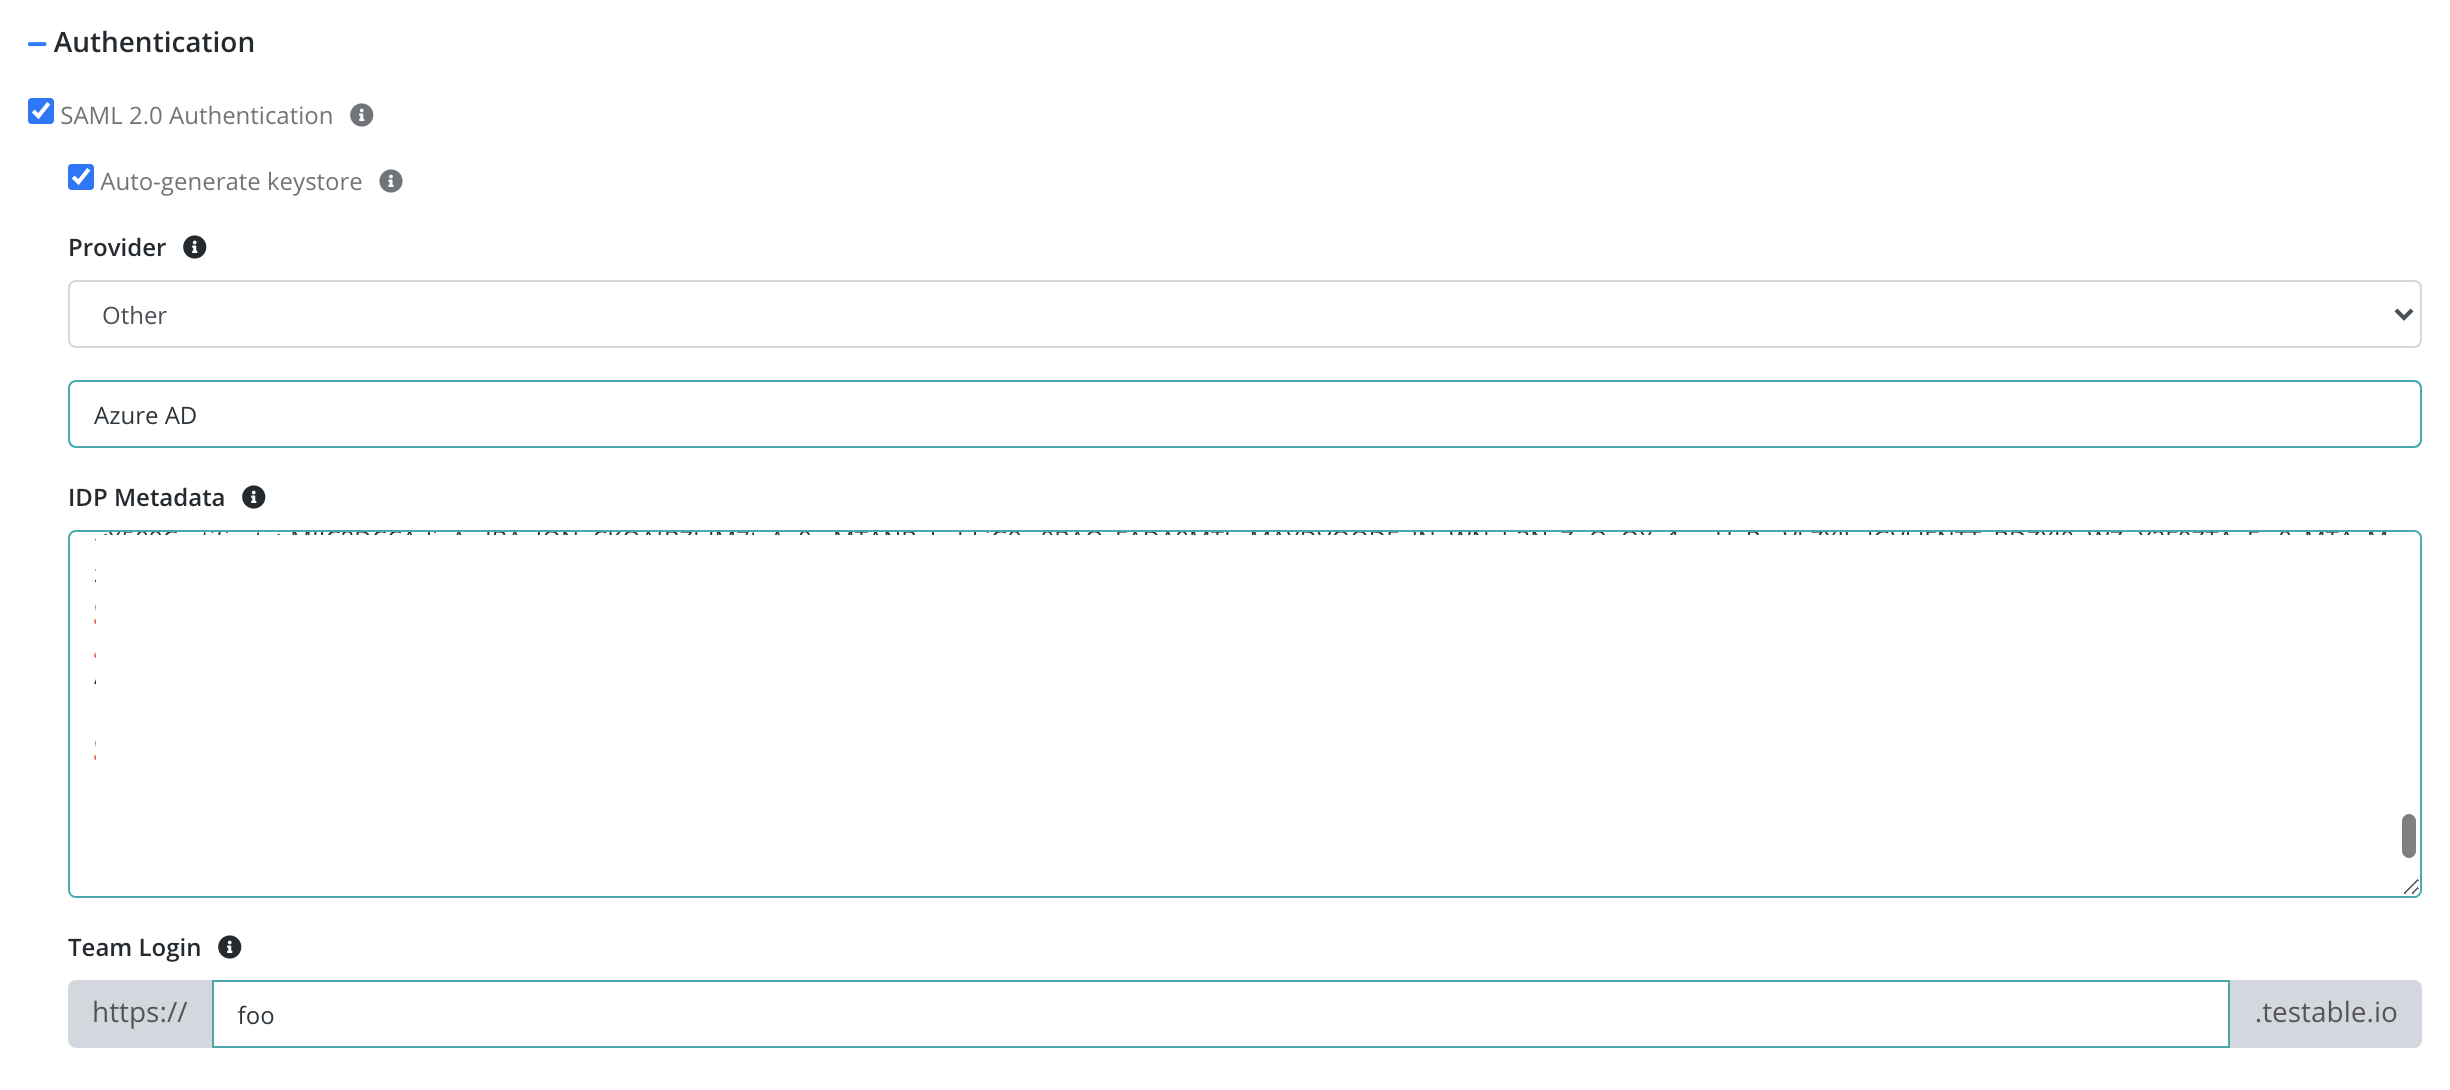
- Fill in the required information
- Provider: The Identity Provider (e.g. Okta, OneLogin). Any provider which conforms to the specification is eligible.
- IDP Metadata: Metadata provided by the IDP as part of the setup process. See the below sections for steps to follow on OneLogin, Okta, and Azure AD. Any IDP should have something similar.
- Team Login: Choose a subdomain from which you will initiate login to Testable (https://[subdomain].testable.io). This is the subdomain that you configured on the IDP side as well.
- Keystore: If you need to know the SP certificate ahead of time you can generate your own keystore and upload it here. See the FAQs below for example instructions on how to do this.
- After setting up the IDP Go to
https://[subdomain].testable.ioand login.
FAQ
If I login via external login am I still allowed to use a password to login to Testable?
No. Once you start authenticating via an external provider your password will be removed from Testable. If you want to switch back to password authentication, you must login via your team’s login page (https://[subdomain].testable.io), go to Account => Profile, and switch the Authentication Source back to Password.
My company has setup external login for our account. Do we need to provision every user on Testable?
No. Once a user successfully authenticates for the first time, Testable will automatically create an account for them and associate it to your organization. No further action required.
How long is my session valid for?
Whether you login using a password or an external login provider, your session is good for 7 days currently.
Can you provide the certificate Testable uses?
By default, a certificate is generated on the fly. If you need to configure the Testable (SP) certificate in your IDP, you can generate a keystore yourself, upload it to Testable, and export it to a X509 certificate.
keytool -genkeypair -alias saml -keypass test.1234 -keystore samplekeystore.jks
Upload this to Testable via Org Management => Settings => Authentication => Uncheck Auto-generate keystore
Then to export to a X509 certificate:
keytool -export -alias saml -keystore samplekeystore.jks -rfc -file sample.crt
How can I delete Testable users when we offboard a user in our IDP?
The SAML 2.0 protocol does not provide a direct way to do this. You can automate this on your side using our Users API.